Copyright © 2017 Lab-Ally LLC
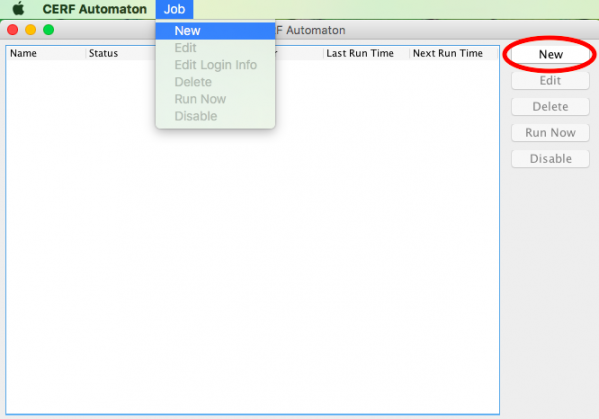
Launch the AC and click on the New button or select New from the Job menu:
Each time you set up a new job, you must enter your credentials (select a server from the drop-down list and enter your username and password). If you need to add a server, click on the Edit Servers button. Click OK.
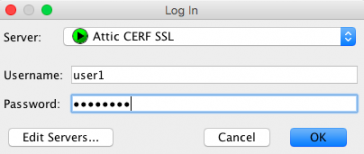
Note that whenever you edit an existing job, you will need to enter your username and password again.
The Edit Job dialog is launched when you have successfully entered your credentials.
Configuring a Job
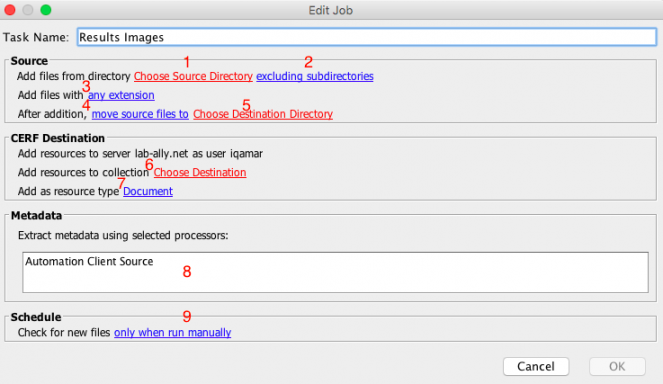
First enter a new Task Name, as shown below on the Edit Job dialog below. The links shown in red must be configured. The blue links display the default configurations and may be changed by clicking on them. Numbered steps are explained below.
Source
1. Click on the link for “Choose Source Directory” to select a directory accessible to this computer that will serve as the source for all files being automatically added to CERF.
2. If you want to include all files in all subdirectories, click on the link to change this setting from “exclude” to “include.”
3. If you want to upload only files with a specific extension, click on the link. Note that you may specify only one file type per job. Enter the extension in the input dialog and click OK.
4. You can choose to delete files after they are uploaded from the source directory or move them to another directory. Click on the link to make this choice.
5. If you have chosen to move files to another directory, select the directory.
CERF Destination
We recommend that you choose a File Cabinet or Folder in CERF as your CERF destination. Your access role in the CERF destination must permit you to add Resources to CERF. Once in CERF, files can be moved to final destinations such as Notebook Pages. In order to optimize performance in CERF we suggest that you edit the CERF destination setting in the AC as soon as a File Cabinet or Folder contains about 50 items.
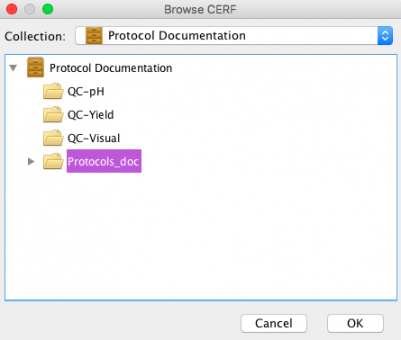
6. When you click on the “Choose Destination” link, the Browse CERF dialog is launched. Select a collection from the drop-down list (the list includes collections in which you have permission to add resources). Select the level for resource addition. Click OK.
7. Select a resource type that will be assigned to all the new resources. Click OK.
Metadata
8. The default condition extracts the standard metadata when each resource is registered to CERF (i.e., title, resource type, creation date, last update, contributor, and file size). There may be other metadata extractors (such as the the Microsoft Word metadata extractor). To extract information added to a Miscrosoft Word document, enter extension type “doc” in step 3 (above). A Miscrosoft Word extractor will be displayed in step 8 (above). Select the Miscrosoft Word extractor. This will extract author, keywords, and comments from the information added to the word document and will include them in the fields fo Dublin Core Author, CERF keywords, and CERF comments in CERF metadata displays.
Schedule
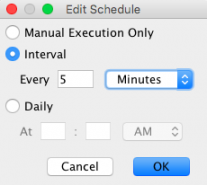
9. Click on the link if you want to select an interval or have the AC upload daily at a specific time (or if you are editing a job and want to change it back to Manual Execution, which is the default condition). After you make a selection, click OK.
After the job is configured, the OK button will be enabled on the Edit Job dialog. Click OK. The job will be displayed on the CERF Automation Client dialog.
Any number of jobs can be configured on the AC.
